こんにちは。エンジニアの山岡です。
突然ですが、リンクにマウスオーバーした時のホバーエフェクト(hover)って、単調になりがちじゃありませんか? フロントエンドの中でもUI/UXデザインに近い分野ですし、特に予算が少なかったりすると、力を入れづらい領域だったりします。
ベースになったCSSのホバーエフェクトを引き継いで納品されることもあったりします。
例えば、半透明
シャドウをかけてみたり
テキストだったらアンダーバーとか。
フロントエンドエンジニアの引き出しが試されるところ!
今回はホバーエフェクトの引き出しのひとつとして、当サイトでも使っているズームイン!をご紹介します。
CONTENTS
サンプル1: ズームイン!
DEMO
とにもかくにも、ズームイン!
※マウスオーバーしてみてください。

HTML
<!--ズームイン!-->
<div class="zoom-image">
    <a href="#" class="zoom-link">
        <img src="photo01.jpg" alt="" class="zoom-photo">
    </a>
</div>
CSS
.zoom-image {
    max-width: 400px; /* 幅を指定 */
}
.zoom-link {
    display: block;
    overflow: hidden;
    padding: 60% 0 0; /* 縦横比を指定 */
    position: relative;
}
.zoom-photo {
    left: 0;
    top: 0;
    display: block;
    height: auto;
    left: 0;
    position: absolute;
    top: 0;
    transition: all .2s ease-in-out;
    width: 100%;
    z-index: 1;
}
.zoom-link:hover .zoom-photo {
    transform: scale3d(1.1,1.1,1); /* hover時の倍率を指定 */
}
サンプル2: 画像に文字を重ねる
DEMO
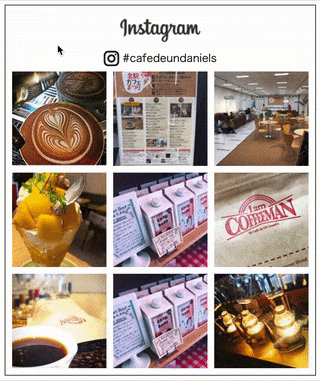
エコクリでも使ってます!⇒料金プラン|エコムクリエーション
HTML
<div class="zoom-with-text">
    <div class="zoom-with-text-image">
        <a href="#" class="zoom-with-text-link">ZOOM!!</a>
        <img src="photo01.jpg" alt="" class="zoom-with-text-photo">
    </div>
</div>
CSS
.zoom-with-text {
    max-width: 400px;/* 幅を指定 */
}
.zoom-with-text-image {
    overflow: hidden;
    padding: 60% 0 0; /* 縦横比を指定 */
    position: relative;
}
.zoom-with-text-link {
    align-items: center;
    color: #fff;
    display: flex;
    font-size: 5rem;
    font-weight: 600;
    height: 100%;
    justify-content: center;
    left: 0;
    position: absolute;
    text-decoration: none;
    top: 0;
    width: 100%;
    z-index: 2;
}
.zoom-with-text-photo {
    display: block;
    left: 0;
    position: absolute;
    top: 0;
    transition: all .2s ease-in-out;
    z-index: 1;
}
.zoom-with-text-link:hover {
    text-shadow: 0 0 35px rgba(0,0,0,.4);
}
.zoom-with-text-link:hover +.zoom-with-text-photo {
    transform: scale3d(1.1,1.1,1); /* hover時の倍率を指定 */
}
サンプル3: モノクロ画像からカラー画像に変化
DEMO
ポートフォリオの様な雰囲気。
HTML
<div class="zoom-grayscale">
    <div class="zoom-grayscale-image">
        <a href="#" class="zoom-grayscale-link">ZOOM!!</a>
        <img src="photo01.jpg" alt="" class="zoom-grayscale-photo">
    </div>
</div>
CSS
.zoom-grayscale {
    max-width: 400px;/* 幅を指定 */
}
.zoom-grayscale-image {
    overflow: hidden;
    padding: 60% 0 0; /* 縦横比を指定 */
    position: relative;
}
.zoom-grayscale-link {
    align-items: center;
    color: #fff;
    display: flex;
    font-size: 5rem;
    font-weight: 600;
    height: 100%;
    justify-content: center;
    left: 0;
    position: absolute;
    text-decoration: none;
    top: 0;
    width: 100%;
    z-index: 2;
}
.zoom-grayscale-photo {
    display: block;
    filter: grayscale(100%);
    left: 0;
    position: absolute;
    top: 0;
    transition: all .2s ease-in-out;
    z-index: 1;
}
.zoom-grayscale-link:hover {
    text-shadow: 0 0 35px rgba(0,0,0,.4);
}
.zoom-grayscale-link:hover +.zoom-grayscale-photo {
    filter: grayscale(0%);
    transform: scale3d(1.1,1.1,1); /* hover時の倍率を指定 */
}
まとめ
もしかするとシャープな印象を受けたかもしれませんが、WEBサイトの雰囲気に合わせて調整できるため、調整次第で印象はがらりと変わります。ぐわっ!と勢い良く動かすか、ふわっと緩やかに変化させるか、それだけでも与える印象は違ってきます。意外と活用の幅は広いのではないでしょうか。
様々なバリエーションを試しながら、ホバーアクションの引き出しを増やしていきましょう!


